Setting up labels
In this step, you will be setting the information you want to print out. You can initially add labels by clicking ‘Start’. You can later add/edit the labels currently being printed out by clicking ‘Edit label information’. A modal will appear allowing you to set the label details.
There are 4 types of labels you can print:
- Block
- Location
- Tray
- Species/variety
When printing labels, you can choose which sub–farm you are printing labels for. You can only print labels for one sub-farm at a time.
Block
When printing labels for blocks, you can choose to print existing block labels or new block labels.
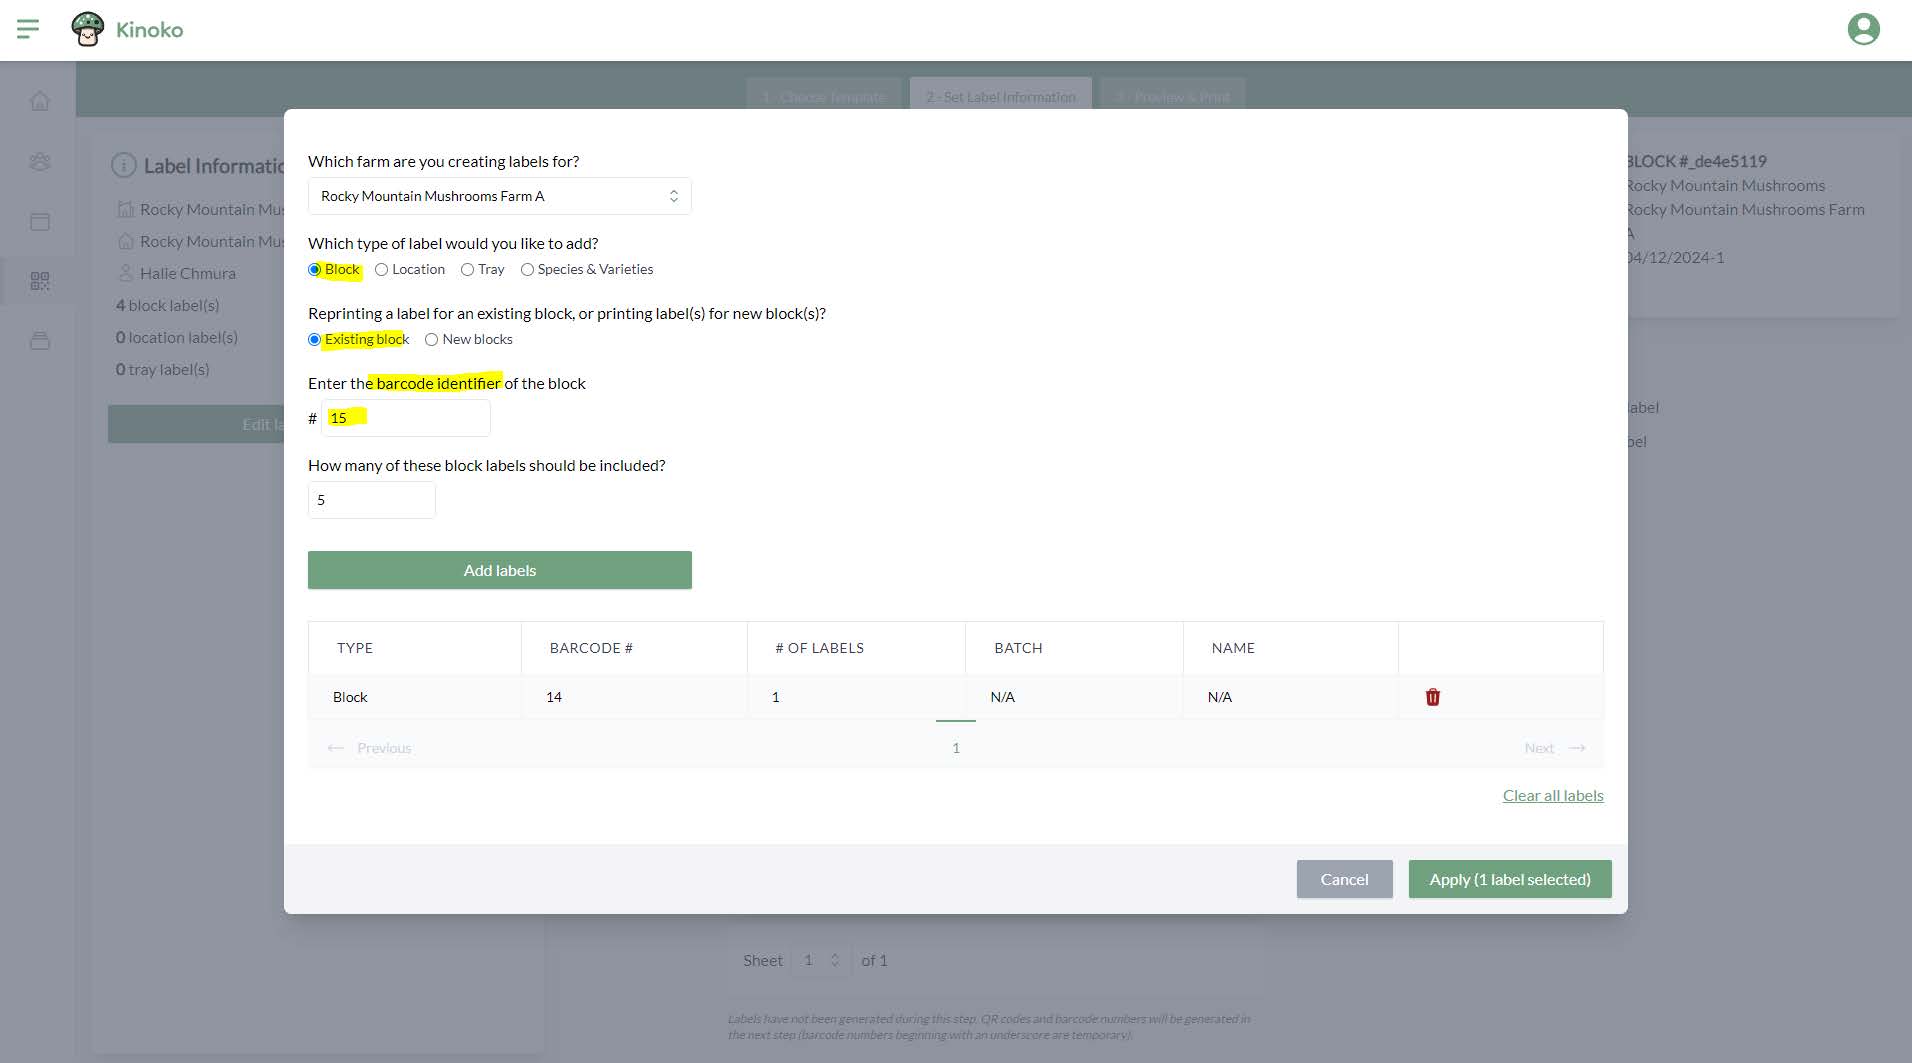
Existing block labels
You may already have printed labels for blocks and scanned them using the mobile app. Later on, a label may become damaged and you will want to print out a new label to replace it. You can do this by choosing ‘Existing block’ and typing in the barcode identifier of the block. You can determine the barcode identifier by looking at the damaged label or by finding the block within the location detail screen within the web app.
Make sure you click ‘Add labels’ after typing in the barcode identifier of the existing block.
New block labels
After creating a batch, you can print out the block labels associated with that batch. To do this, you can choose ‘New blocks’ and then select the batch you are printing labels for:
Make sure you click ‘Add labels’ before hitting ‘Apply’.
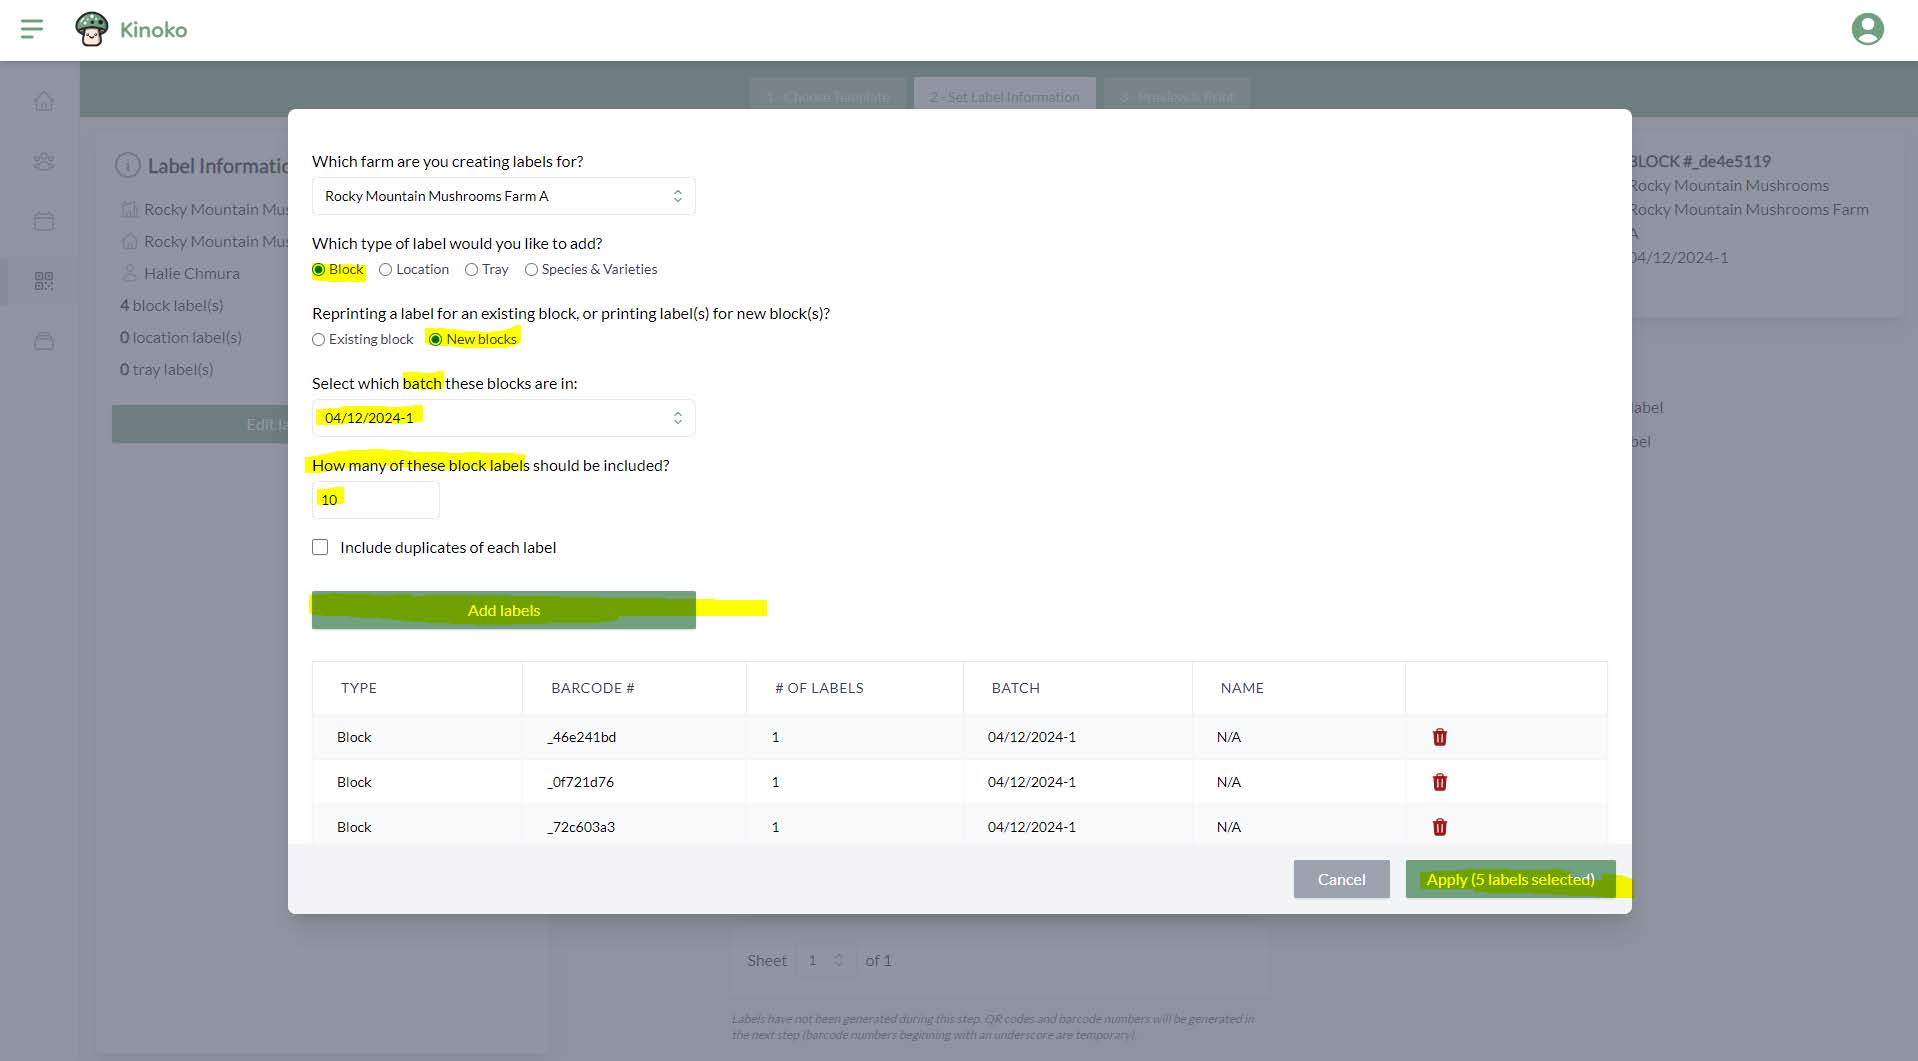
The barcode identifiers generated here are temporary and will not actually be generated until the Preview & Print step.
Locations
Locations are created using the ‘Location Wizard’. You should print a location label for every location you created, and then place these labels around your farm to be used within the mobile app.
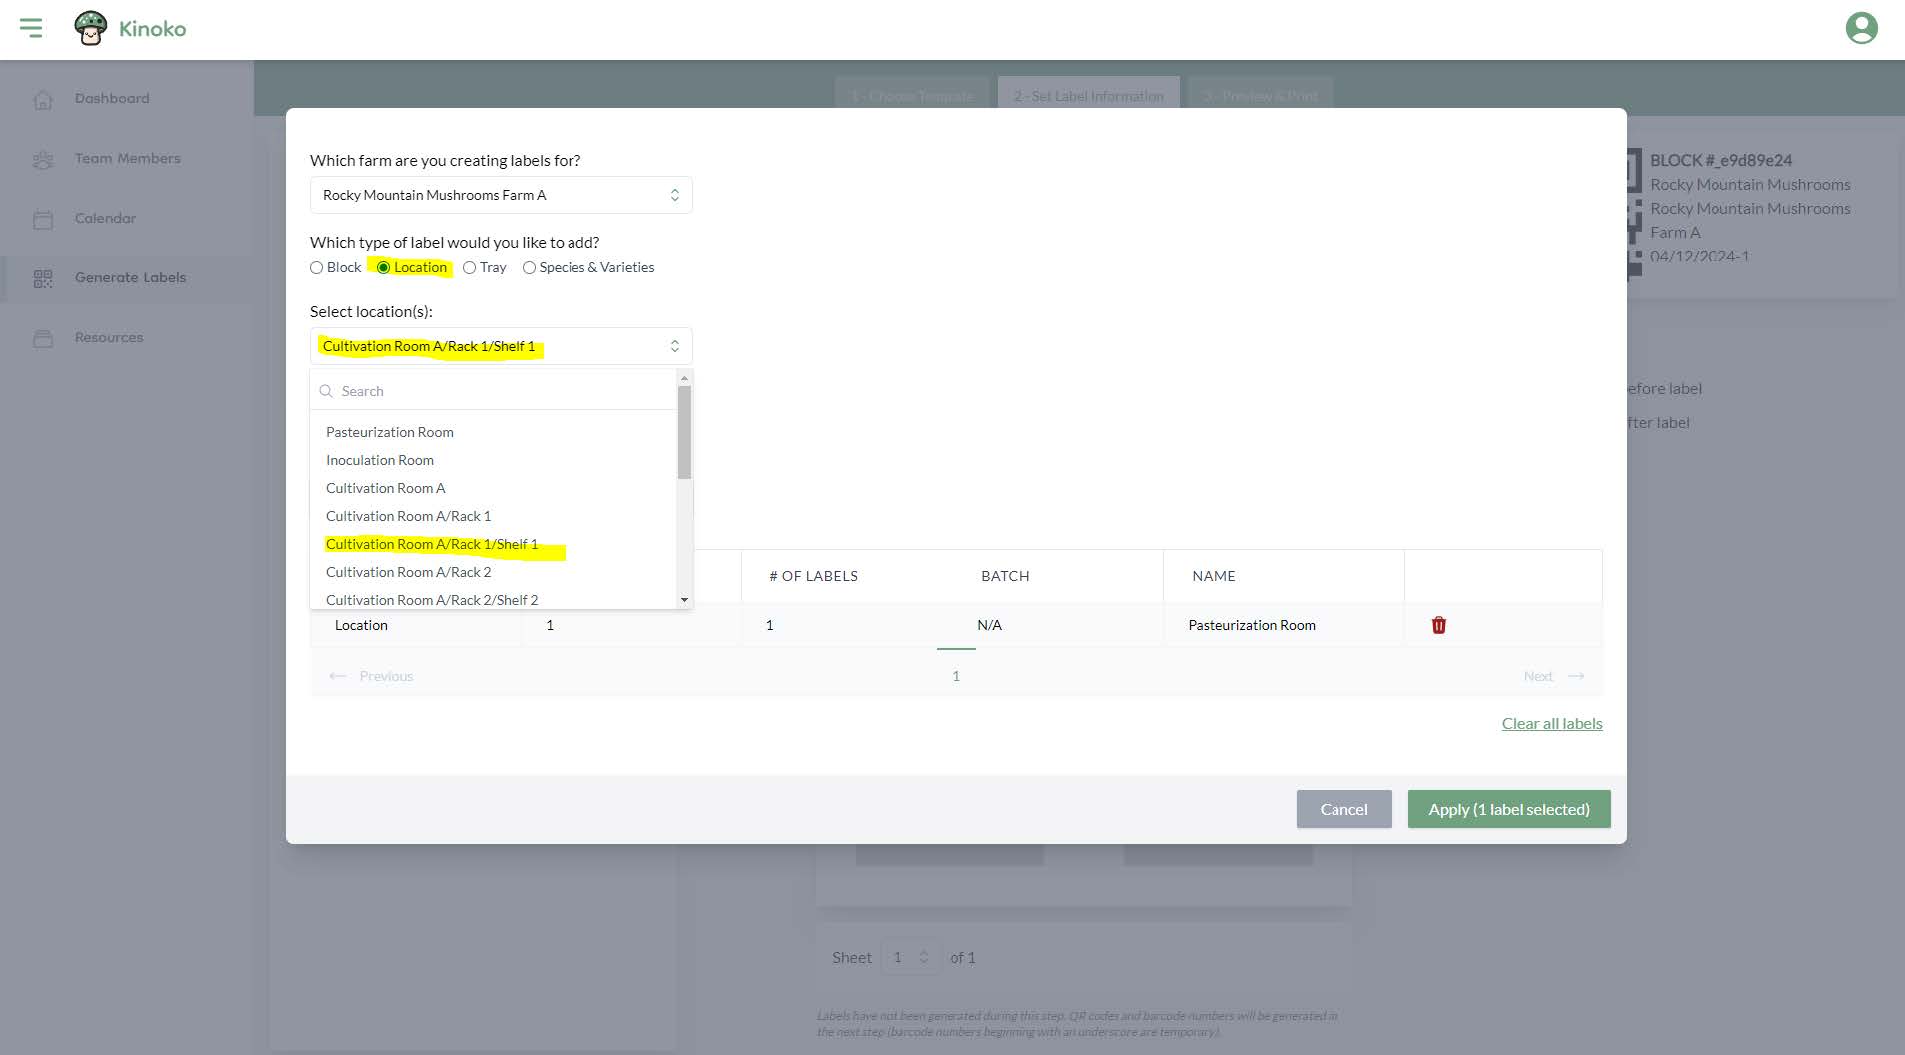
After selecting a location or locations, make sure to click ‘Add labels’ before hitting ‘Apply’.
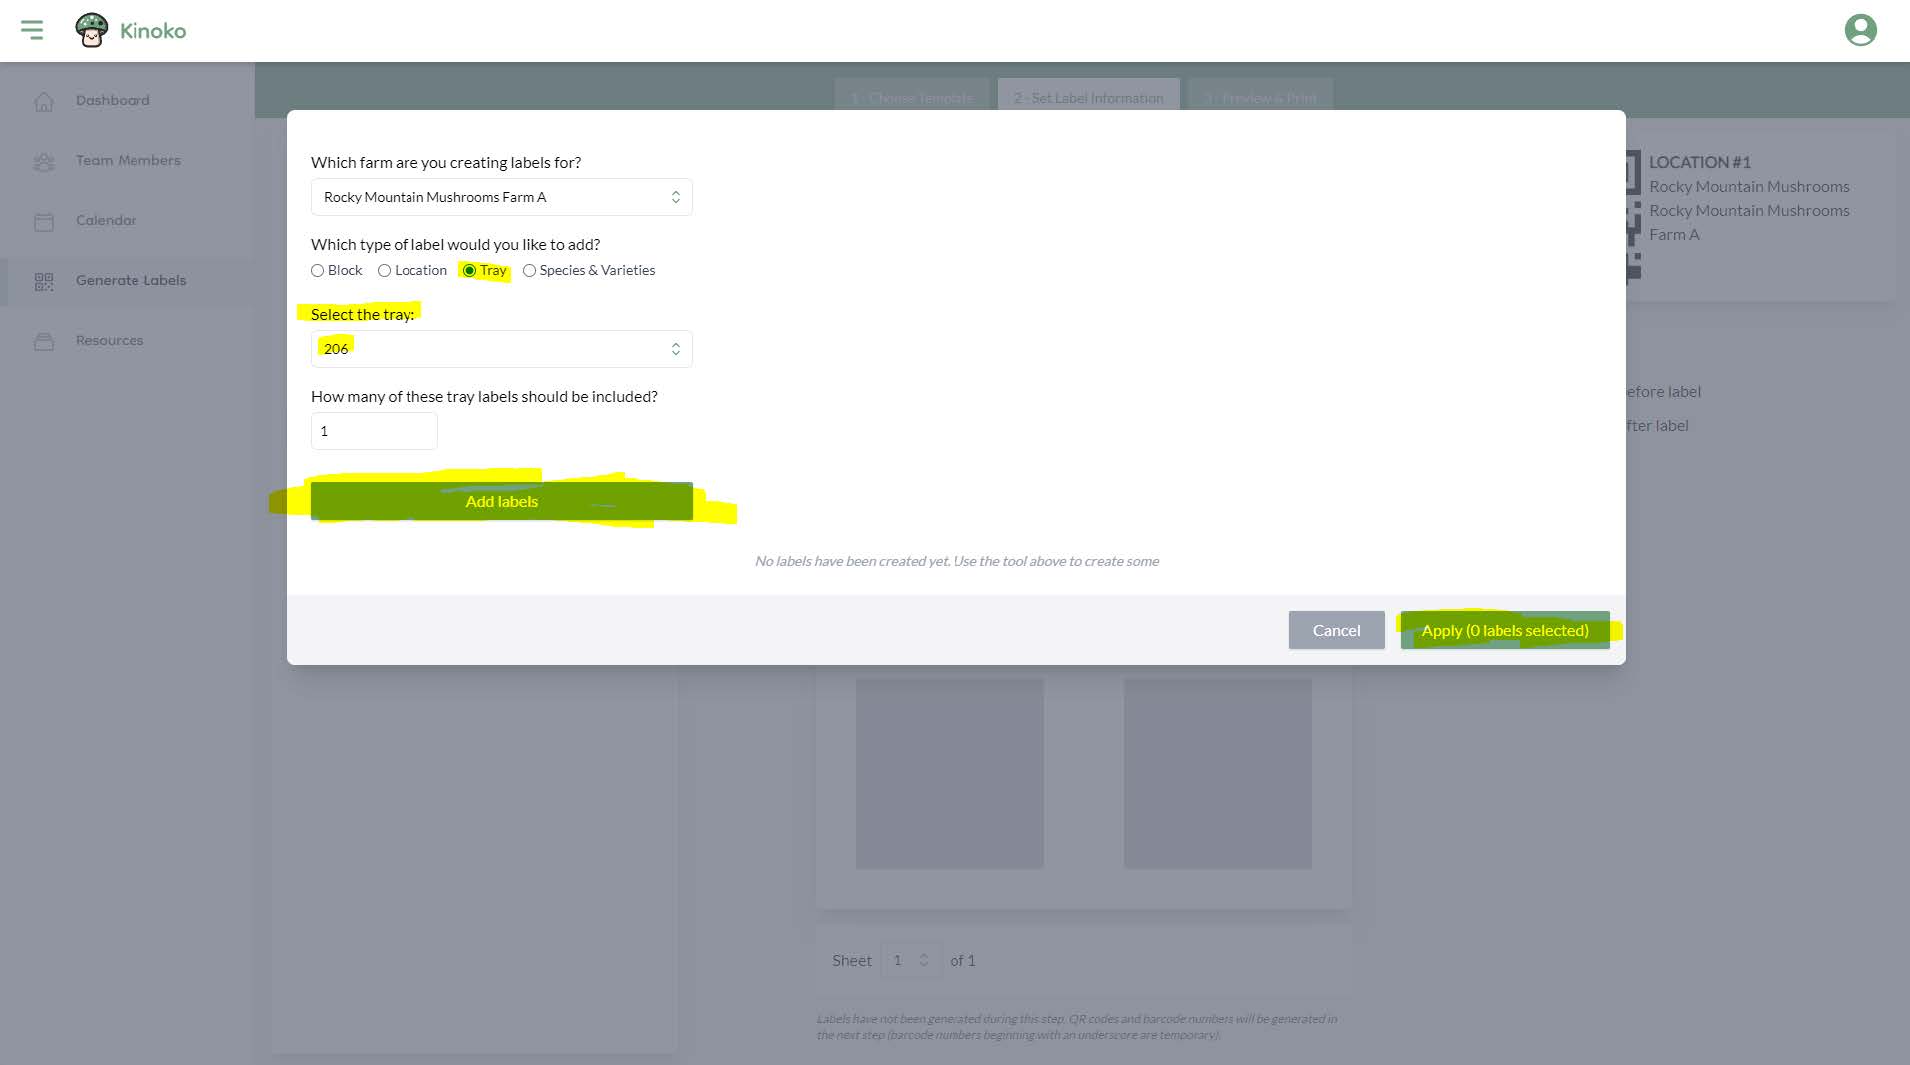
Trays
Trays are created within the resource management screen and are used during harvesting on the mobile app. You should print out a QR code label for each tray you create and then place the label onto the corresponding tray.
When choosing the tray to print within the modal, you will select the tray by barcode identifier. After selecting a tray, make sure you click ‘Add labels’ before hitting ‘Apply’.
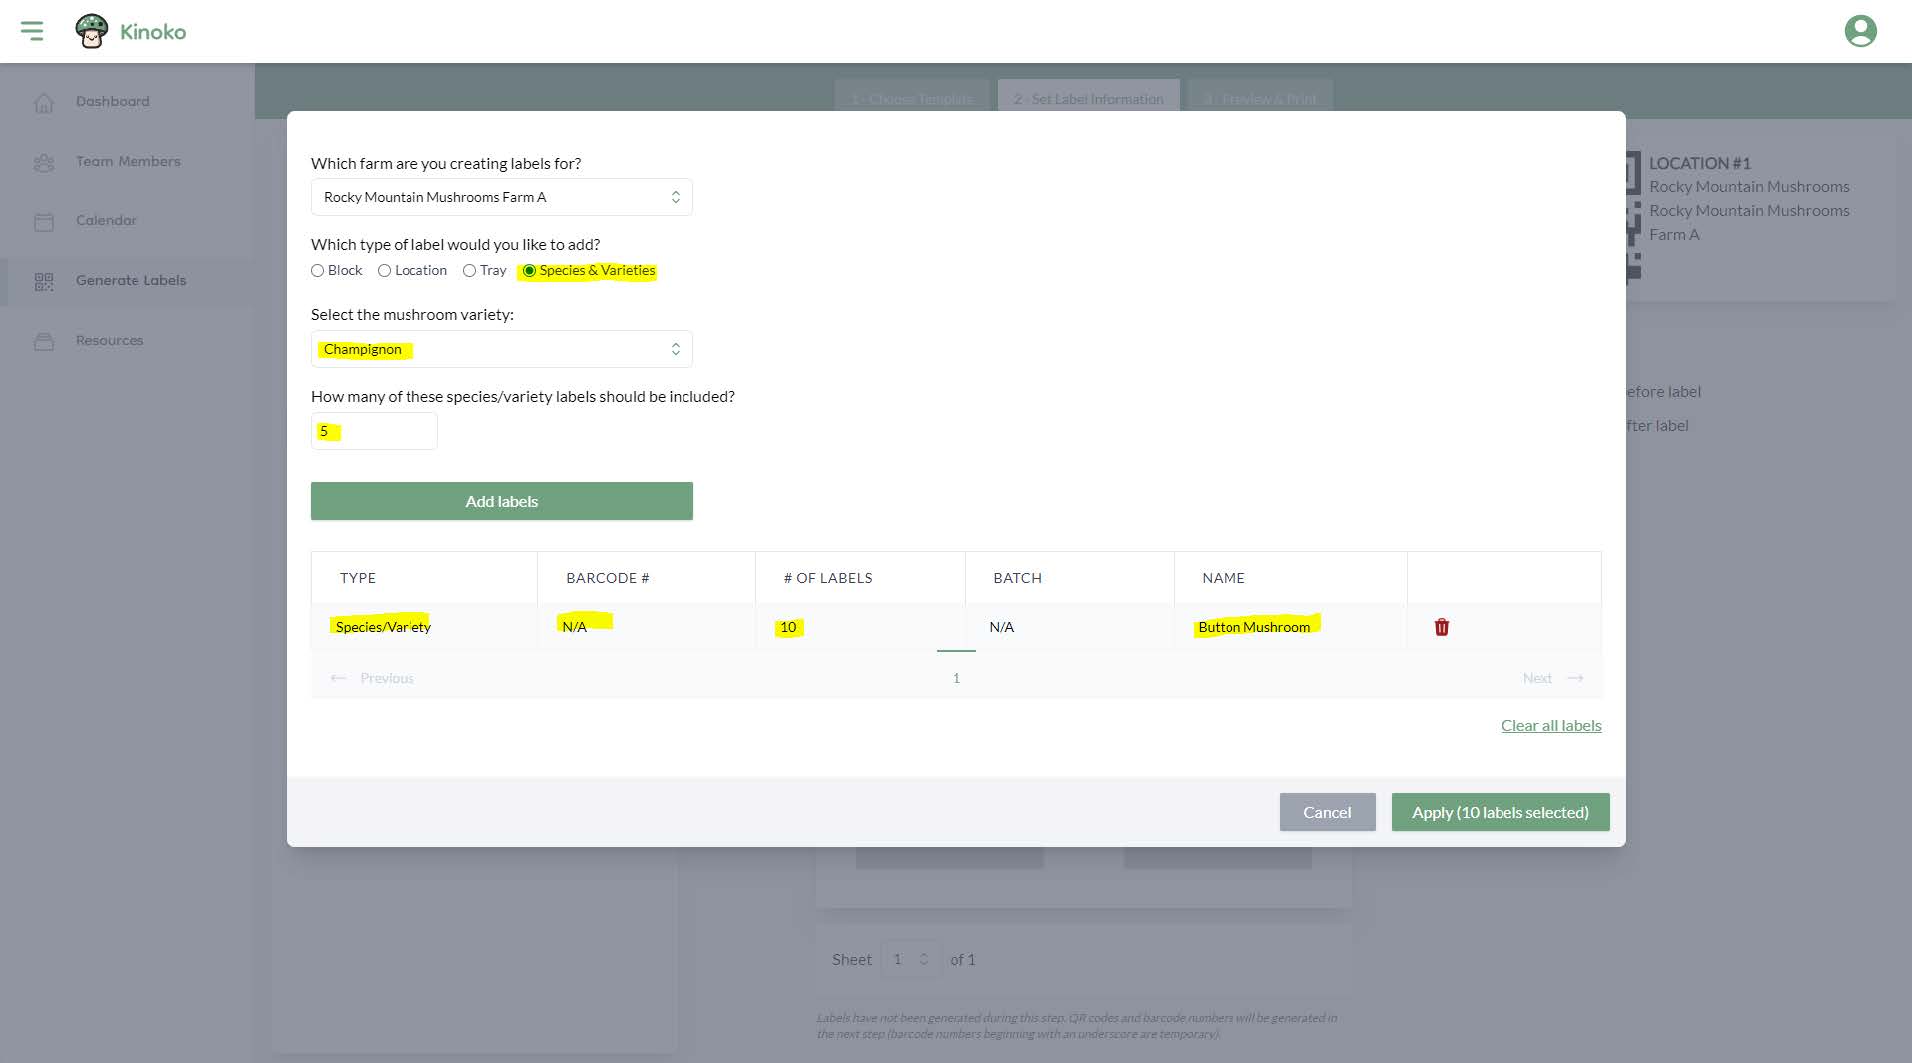
Species/varieties
Species and variety labels are completely optional to use. They were created if you would like to preprint a stack of labels of a certain variety that you can place on your blocks to easily identify which variety they are after inoculation. These labels have no barcode identifier and are only meant to serve as a convenience for your farm.
Managing label information
After clicking ‘Apply’ on the label information modal, you have the ability to edit the layout of the labels. For instance, you may have label sheets on hand that are missing the first 5 labels. You may want to shift all the labels over 5 spaces so that you can still use that label sheet. To do this you have several actions available to you:
- Insert a blank before a label
- Insert a blank after a label
- Erase a label (ie remove a label but don’t shift labels)
- Delete a label (ie remove a label and shift labels)
- Undo
- Redo
You can complete these actions by clicking on a label and either using the top toolbar or one of the provided actions underneath a label:
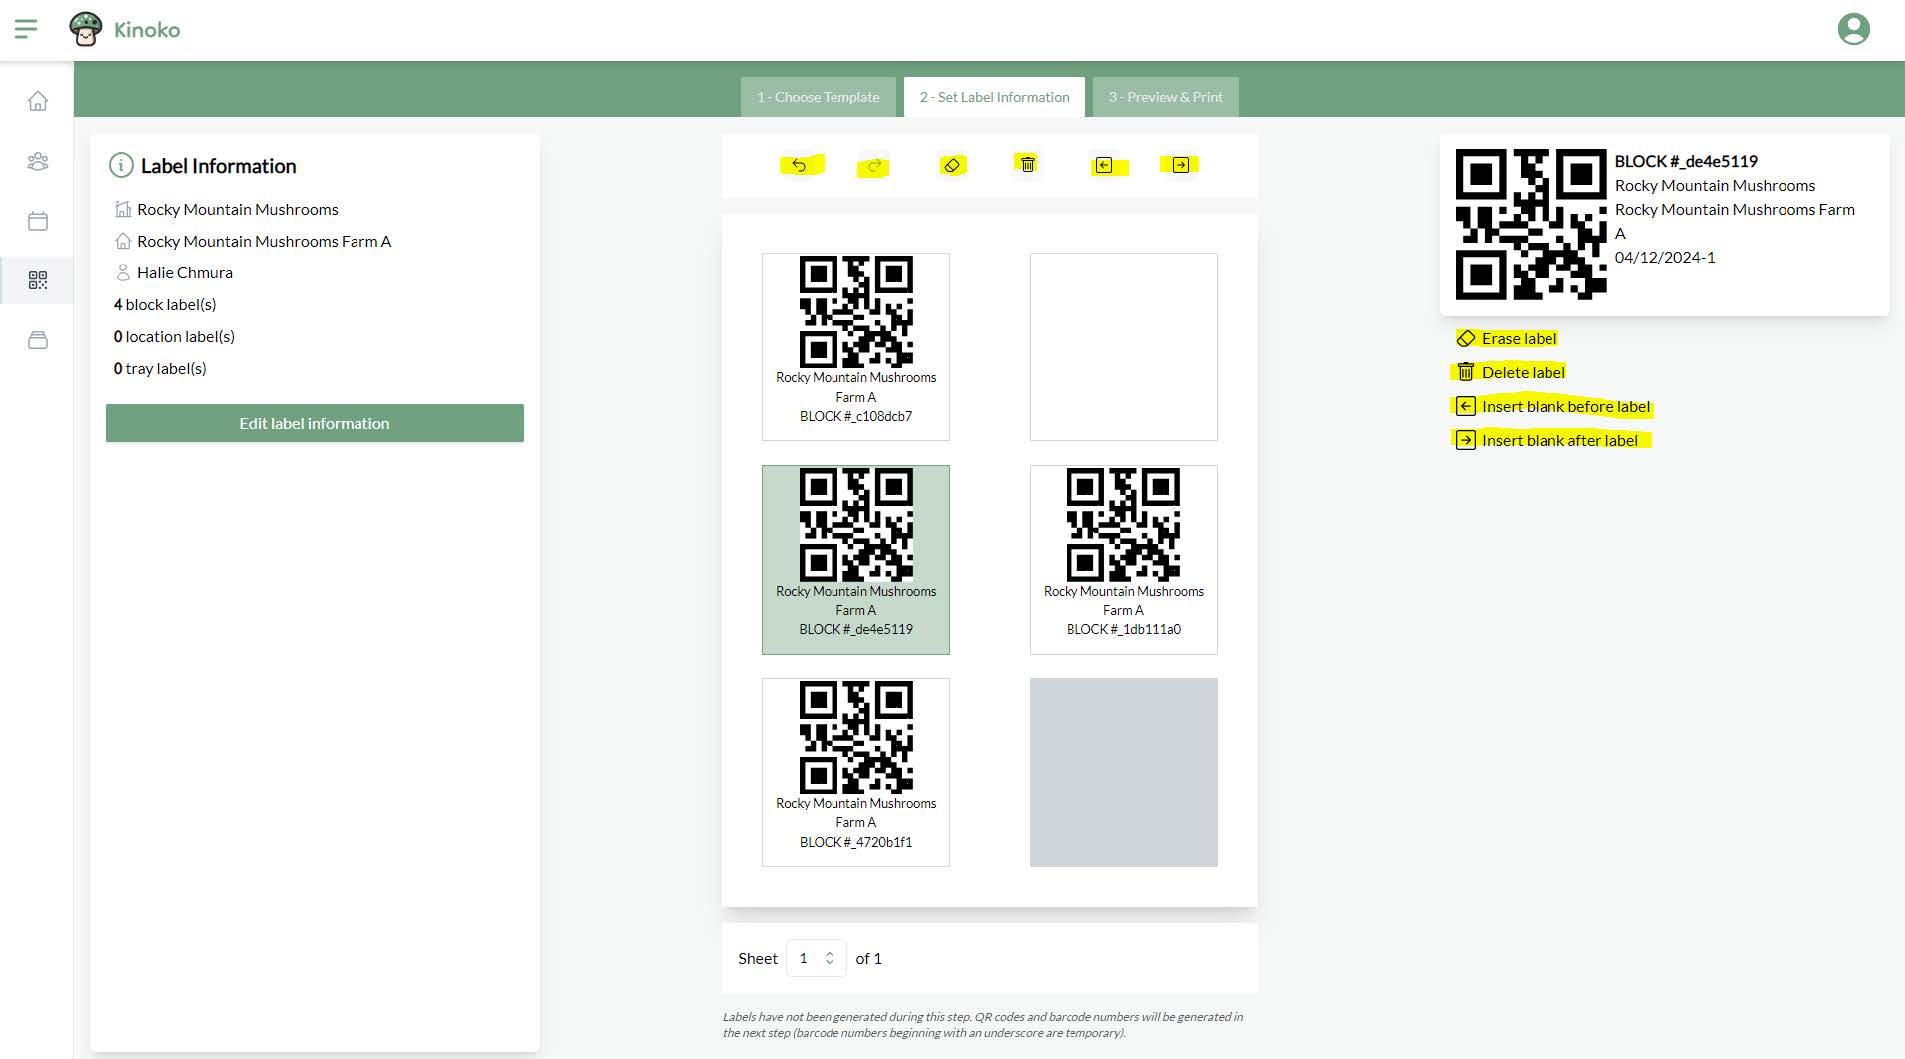
The data within the QR codes has not actually been generated during this step. This means that if you were to directly scan one of these labels from the mobile app, they would not work. The real labels are generated within the next step.