Pasteurization panel
The pasteurization panel allows you to see the batches currently in your sub-farm. Each time you create a batch (ie a set of blocks that contain the same substrate and are of the same bag weight that are pasteurized together) on your farm, you would log into Kinoko and enter the information for a new batch.
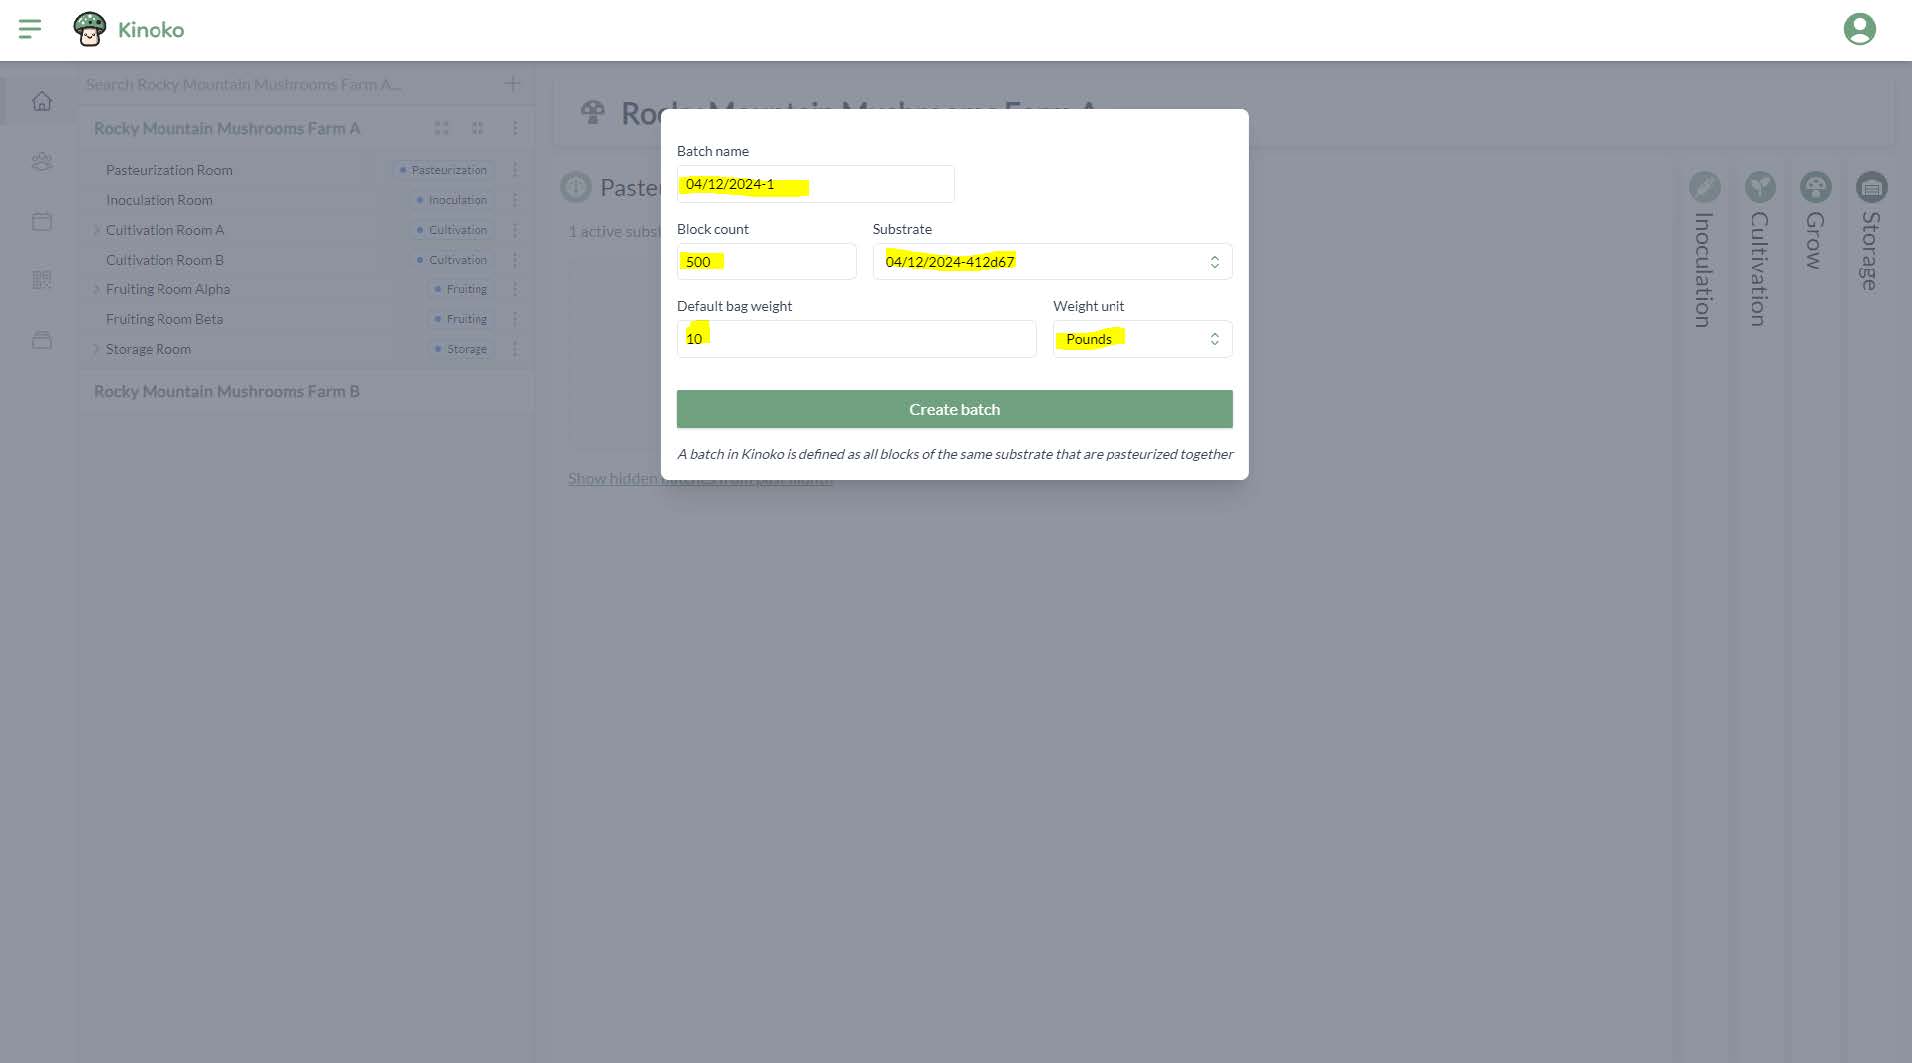
You create a new batch by clicking the tile labeled ‘Start a new batch’. A window appears where you can enter the following information about the batch:
- batch name - we autogenerate a batch name for you. This can be anything that helps you distinguish between batches
- block count - an estimate on the number of blocks in this batch. It is okay if this number isn’t 100% accurate
- substrate - which substrate was used in this batch. You will first need to create a substrate within the resource management screen before you can create a batch.
Ideally, every time you have a new substrate mix, you would go into Kinoko and create a new substrate. However, if you do not care about tracking substrates, you could simply make one and always use that one
- bag weight - this refers to the size of your bags (eg. 10lb bags were used in this batch)
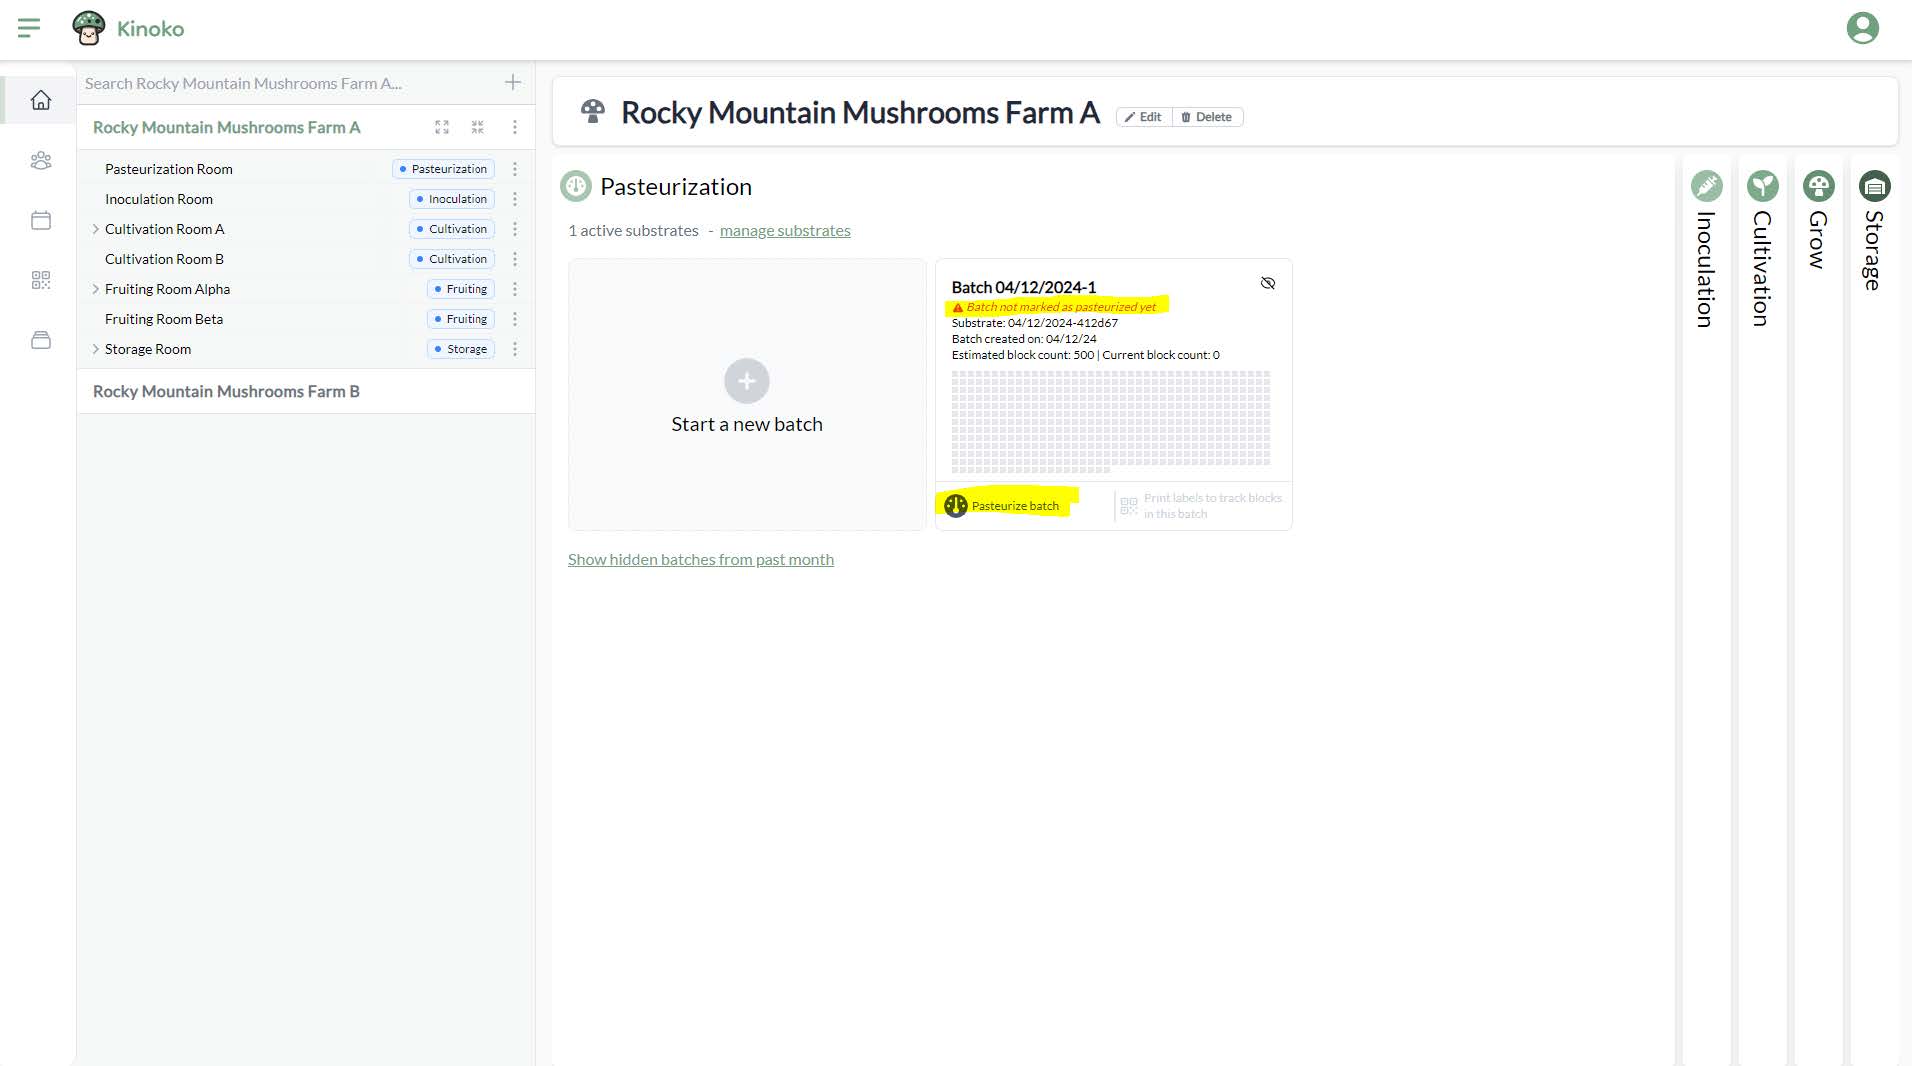
After creating a batch, you will see a new batch on the pasteurization screen. You will see a message saying ‘Batch not marked as pasteurized yet’. You will not be able to print out QR code labels for blocks in this batch until the batch has been pasteurized.
You will also see gray squares representing each block in this batch. The number of squares is equal to the number of blocks you estimated with the ‘block count’ field. As you scan blocks into the system using the mobile app, you will see in real-time these gray blocks turn to green. A green square represents a block that actually exists on your sub-farm.
You can edit the information you previously provided for a batch by clicking on the batch itself. (eg if you want to change the number of blocks in this batch, click the batch tile itself and the modal will reappear).
To pasteurize a batch, you can click the button labeled �‘Pasteurize batch’ in the bottom left of the batch tile:
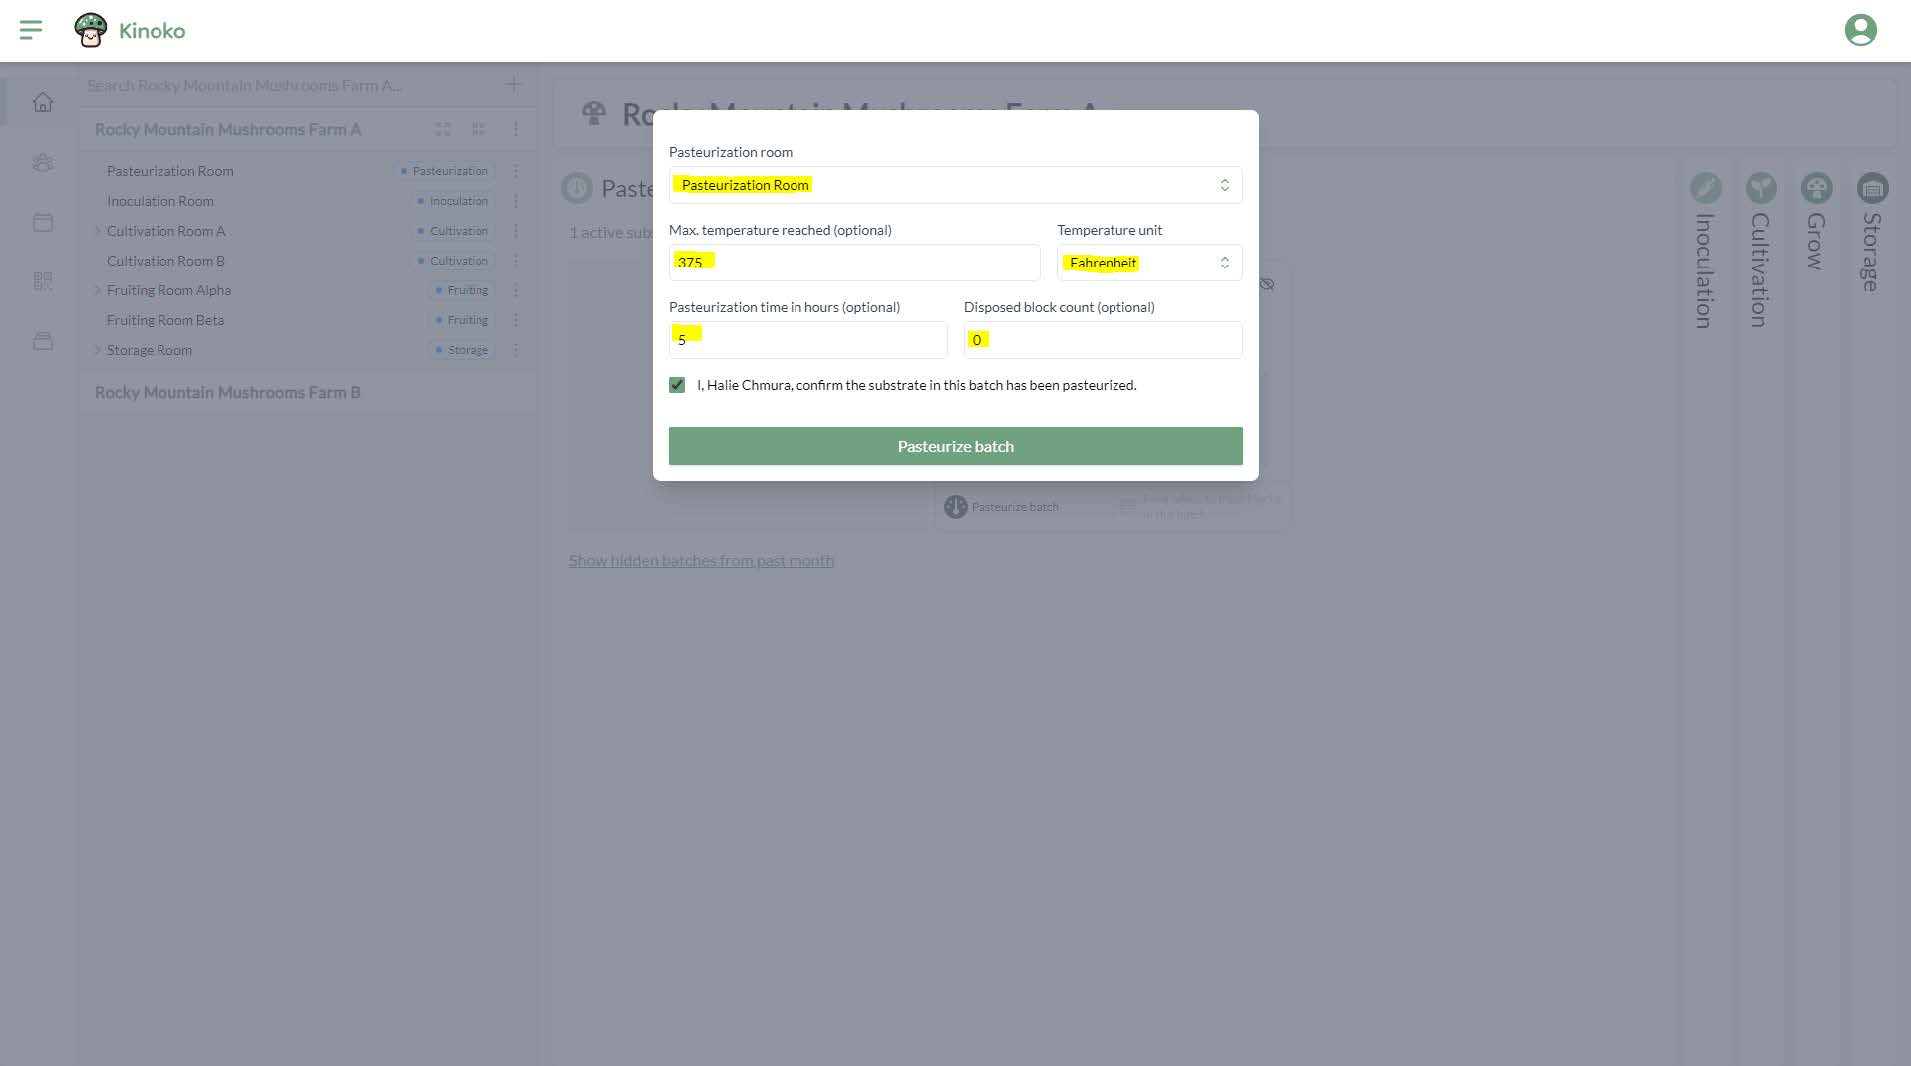
A window will appear allowing you to enter information about the pasteurization of this batch. You will be able to provide the following information:
- pasteurization room - which location these blocks are being pasteurized in. This value is required, which means you must have a location of process step pasteurization before marking a batch as pasteurized
- max. temperature reached (optional) - if you would like to track the temperature reached during pasteurization, you can optionally include this value
- pasteurization time in hours (optional)
- disposed block count (optional) - how many blocks did you have to dispose of due to any problems that may have occurred within the pasteurization location
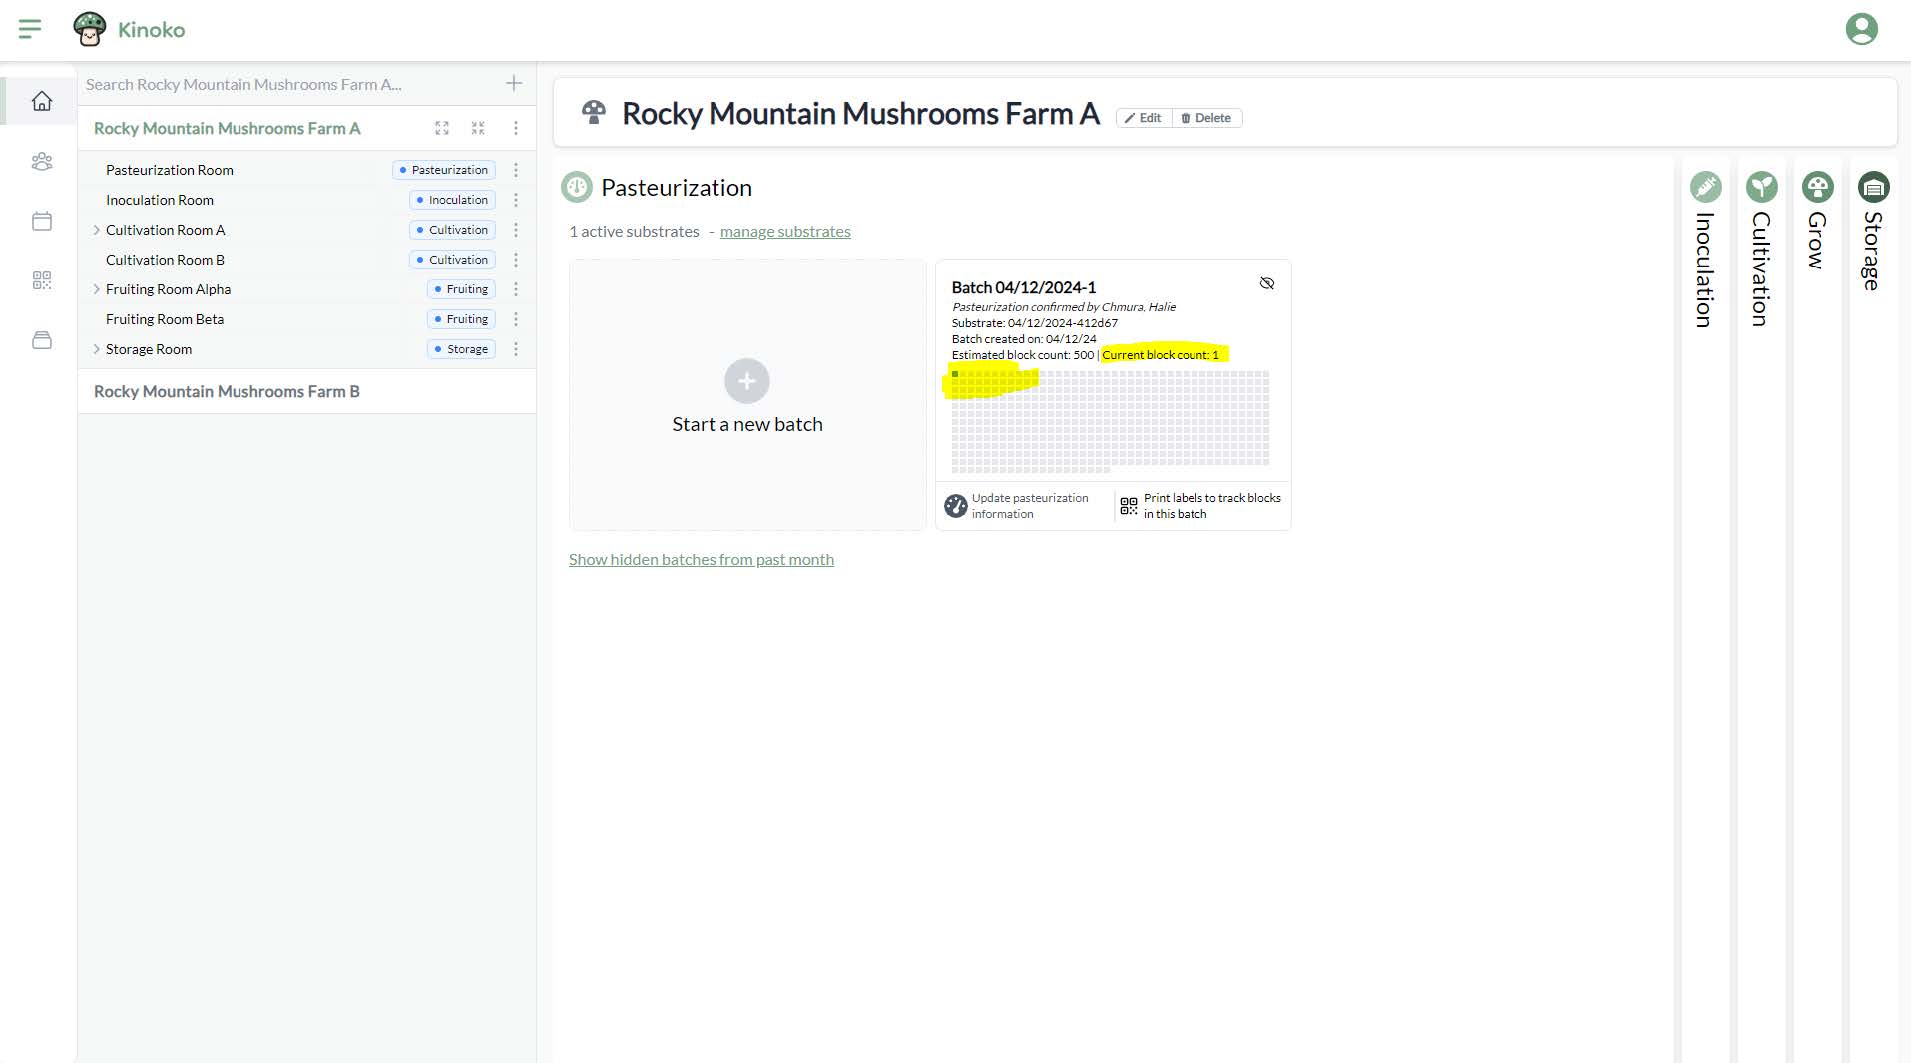
Once you mark a batch as pasteurized, you are able to print QR code labels for blocks in that batch using the bottom in the bottom right of the batch tile labeled ‘Print labels to track blocks in this batch’.
After you print a label for a block in this batch and scan the block using the mobile app, a gray square representing a block will turn green within the batch tile:
Batches will perpetually show on the farm dashboard until you choose to hide the batch. You can hide the batch by clicking the eye with a slash through it in the top right corner of the batch tile. You can view hidden batches from the past month by clicking ‘Show hidden batches from past month’ on the bottom of the pasteurization panel. We recommend hiding batches after you have inoculated all the blocks of that batch.